Enchiladas Potosinas filled with Quinoa and Feta.

Enchiladas Potosinas are not like the enchiladas you normally see but I can tell you that they are even better than the ones you know, they are a sort of empanada made with corn masa with a distinctive orangy-red hue.
The masa is tinted and enriched traditionally with a cascabel chili adobo (mix of dry chillies and garlic), then this is filled with a crumbly local queso fresco and a bit more of the chilli adobo. The level of spice is something you can easily adjust which makes them perfect for little ones and grown-ups. They were invented by chance in the small town of Soledad, San Luis Potosi, when a local cook called Cristina Jalomo accidentally contaminated the “molino” (a machine used to grind the nixtamal corn to make tortillas) with dried chilli paste but the result was a tasty chilli-based masa that she then used to make a meal for her family.
They are typically sold in Mexican markets after being freshly made by being warmed up over a hot pan and then packed up to take home. Once you have them home they are fried in a little oil to prepare and truly are delicious with a crispy flavoursome crust and fresh cheese filling. Actually very modest and based on just a few ingredients that come together to make these so unique, served them with a side of homemade guacamole, beans and salsa, it’s all you need.
Here, I make a new version of them with the things that I like to taste and I pay a little homage to these enchiladas from my hometown. My filling is made with cooked quinoa, feta cheese (which is similar to the queso fresco from San Luis Potosi), fried onions in butter and fresh oregano leaves. Once they are fried and still warm I add a spoonful of creme fraiche, salsa and sprinkle of Maldon salt on the top to get them ready for that first bite which is just heaven!
Makes 10
Ingredients:
1 cup corn flour.
4 Guajillo chilli.
1 Garlic clove.
1 tsp Salt.
Hot water (about 1, 1/2 cups).
120 g feta cheese.
1 white onion.
1 tbsp butter.
2 cups of cooked quinoa.
A handful of fresh oregano leaves.
Maldon salt, black coarse pepper to taste.
1 tbsp extra virgin olive oil.
About 1 cup of rapeseed oil for frying, you can use any neutral taste oil.
Method.
Begin by making the guajillo mixture to colour your masa. First de-seed and get rid of the stems of your guajillo chillies, then peel and lightly fry your whole garlic clove; once it gets a bit of colour I add the dry chillies and fry them lightly. It takes a few seconds and you can start smelling the guajillo, this is when I add 1 cup of the water, a pinch of salt and black coarse pepper to taste. Bring to boil and then simmer on a medium heat for about 20 min, just enough to make your chilies turn soft and finish cooking the garlic.
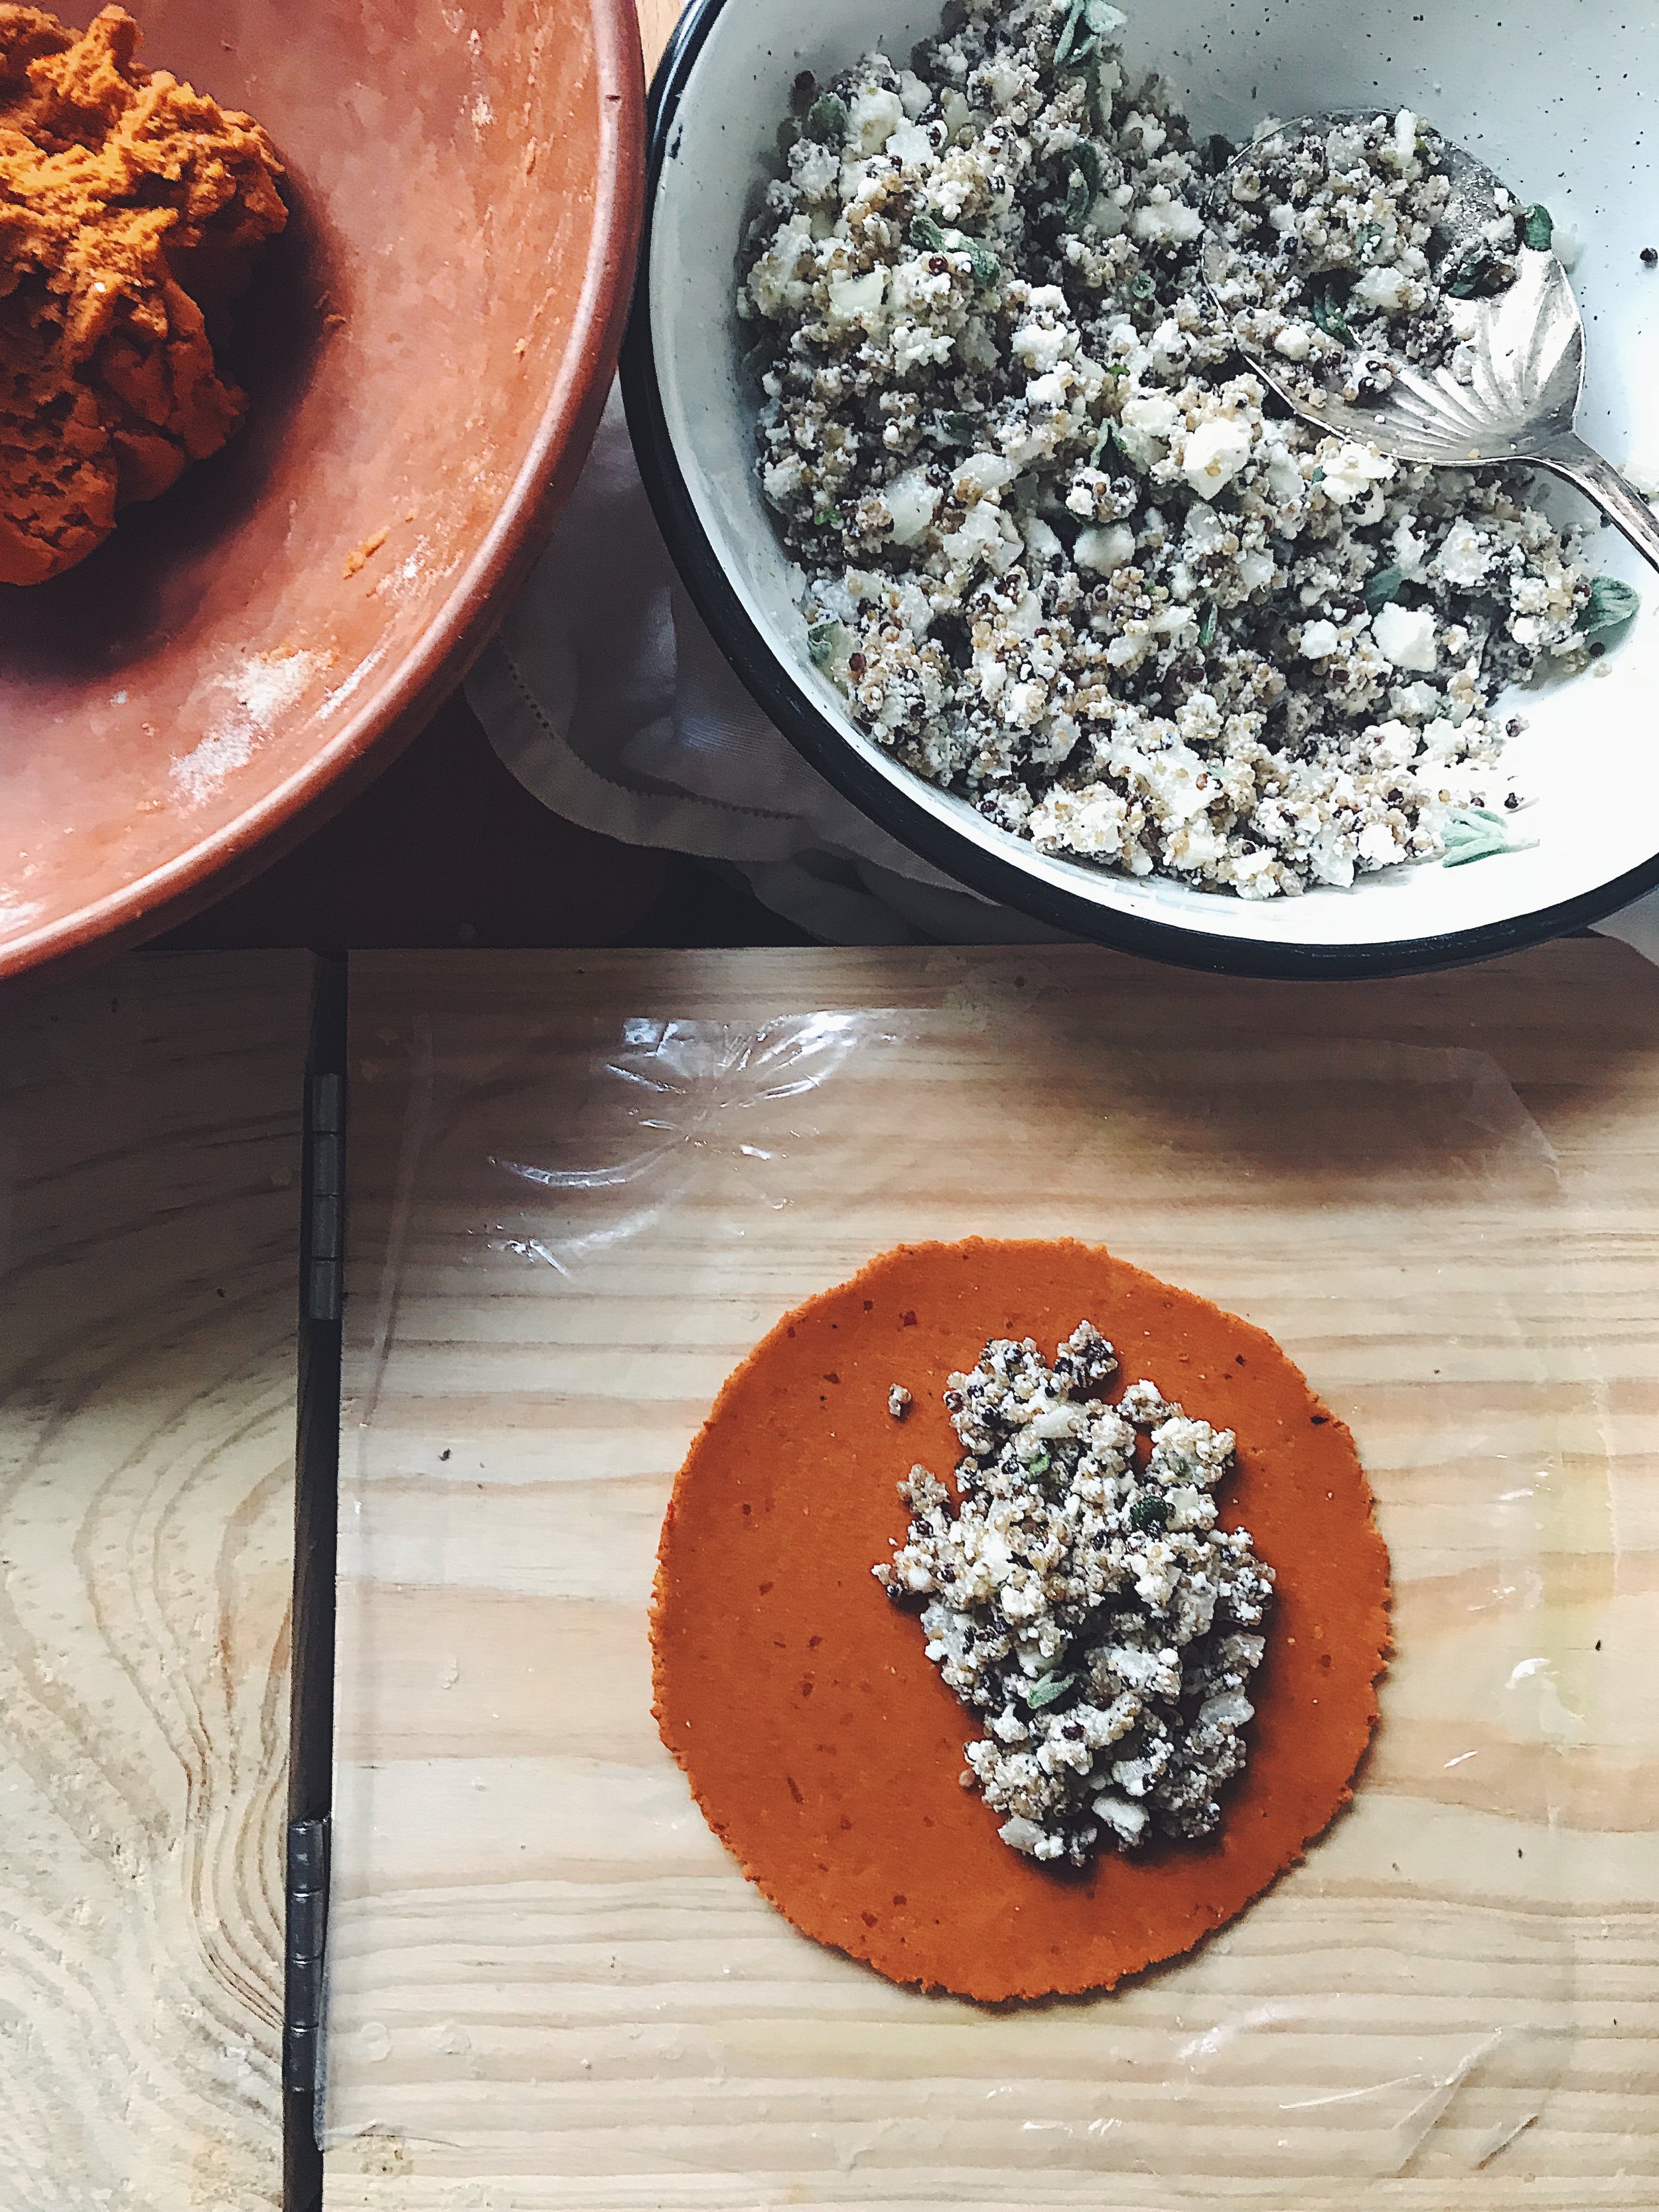
Blend your chili mixture to be really smooth. Get a medium size bowl and combine your corn flour, salt and chili mixture, mix with your hands until it’s all well integrated and add the remaining hot water little by little. Integrate with a wooden spoon until the mixture is cool enough to work with your hands. Work your masa over the kitchen surface and knead briefly, making sure you have a moist but not sticky masa.
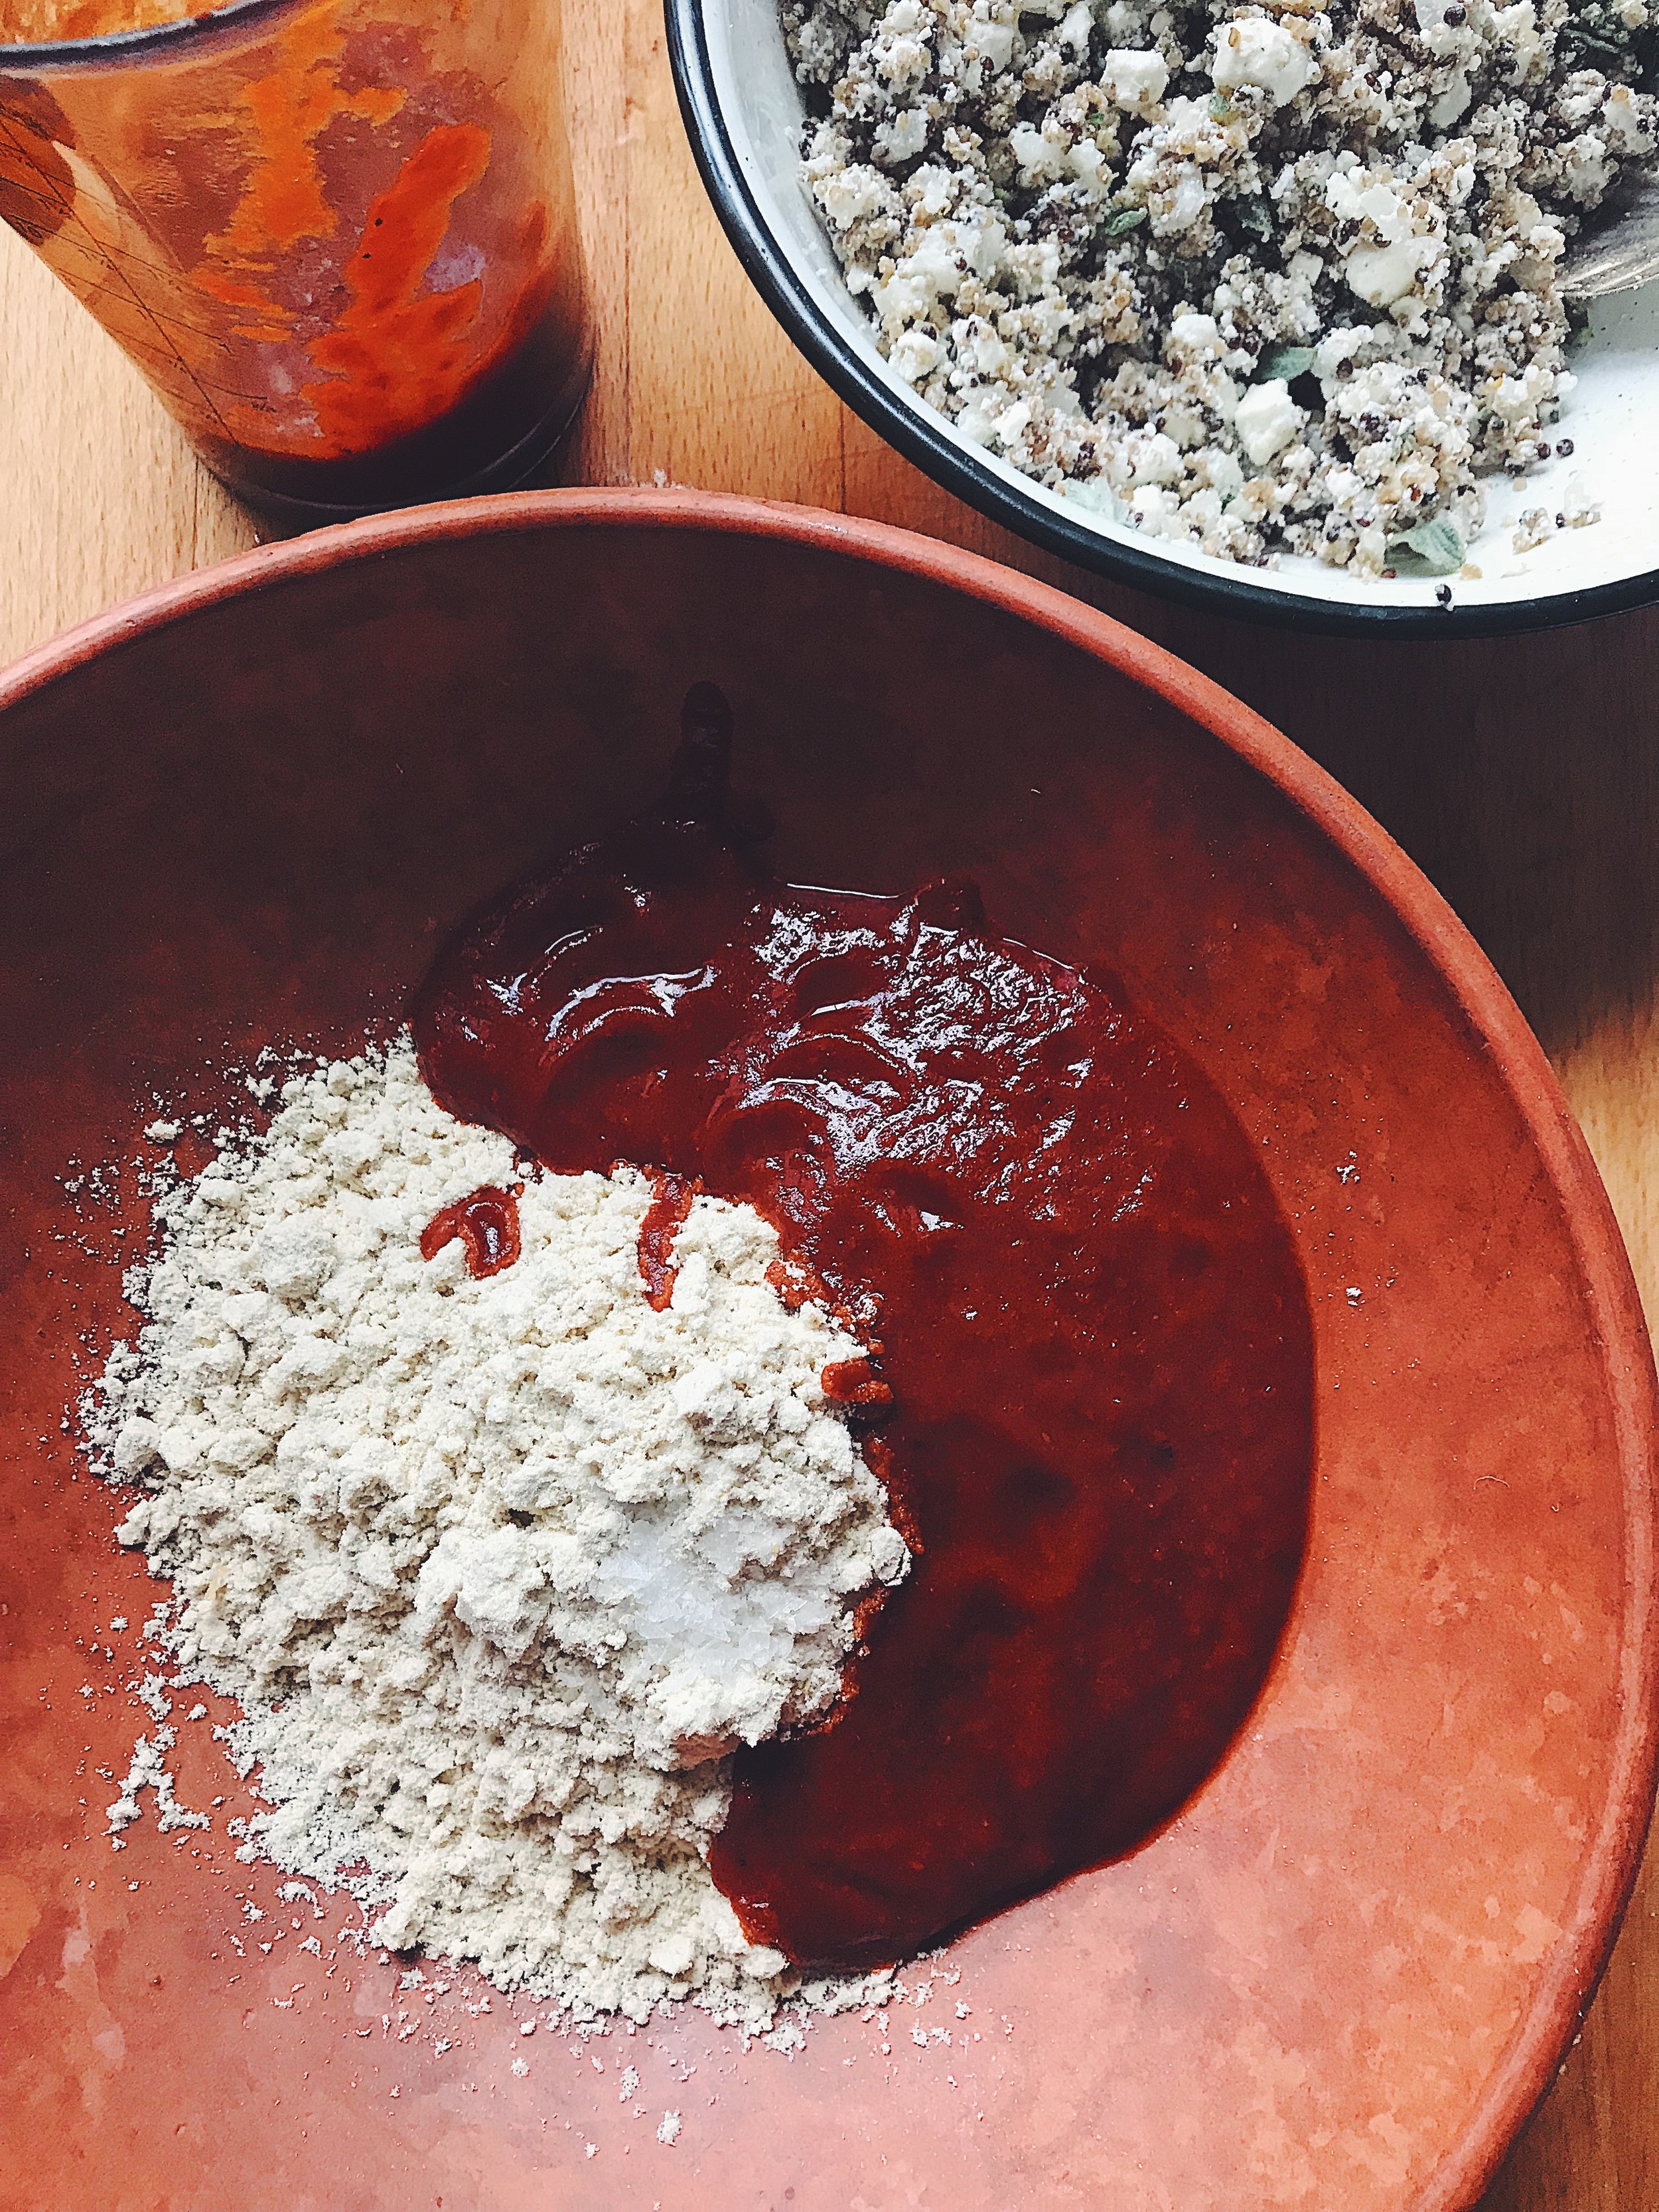

For the filling fry the finely chopped onion in the butter, cook slowly and reserve, let them cool down before using. Crumble your feta cheese and mix it with the cooked quinoa. Add the oregano leaves, finely chopped, and your fried buttery onions, mix with a spoon and taste. Add black coarse pepper and a light drizzle of extra virgin olive oil to bring all the ingredients together.
Get your guajillo masa and, in the same way that you would make tortillas form a masa ball with your hands, place in the tortilla press between two pieces of plastic film (I use a medium size ziplock bag and cut the sides - you can clean this with a paper towel and reuse many times). Press your masa down and add a spoonful of your feta quinoa filling, fold in half as if you were making empanadas, and with the tips of your fingers press the edges to seal the enchiladas. Repeat the same process with the rest of the masa and filling.

Heat up a non-stick pan, and warm the enchiladas slightly for a minute or less on each side (be careful not to burn them). Once you have done this they can be cooled down, wrapped in cling film or bees wax wraps and you can store them in your fridge for up to a week; you can freeze them for a month just be aware that they have to be fully defrosted before frying.
But if you are like me and you can’t wait to enjoy them, heat up the rapeseed oil in the same pan and shallow fry until bright red and crispy. Remove any excess oil by letting them rest over a paper towel, and they are ready to serve. A few of these and the sides of homemade refried beans, guacamole and salsa make a beautiful and delicious meal for your family.